
CoffeeScript: JavaScript Touch Events
We’re going to be building a from-scratch (library agnostic) touch event system using JavaScript and CoffeeScript.
Huh?
You know, when you move your finger around the screen on a touch device? We’re going to be writing the JavaScript to keep track of all that. Instead of, you know, relying on plugins that don’t do exactly what you want.
Goal
Our final product: a pure JS solution for fine-tuning your touch and swipe events. You can not only track a touch event like using jQuery Mobile’s Swipe Event, but you can fine-tune how you think your program can work. Maybe you want to invent your own gesture. Maybe you think swipes should be triggered by a bit more distance. Maybe edge swipes drive you nuts. Maybe you just want to learn CoffeeScript and this was the first article your poor, poor soul stumbled upon.
Requirements
Get CodeKit. No, seriously. Download the free trial if you’re poor. When you’ve added your working directory to CodeKit, it handles compiling automatically.
What, already used your free trial? Install NodeJS with the CoffeeScript module and run something like
coffee -c -w myfile.coffee
from your Terminal while you work.
Also, I recommend using Google Chrome for testing. Recent versions have a Enable Touch Events setting in your Console settings (the little gear at bottom of the Console). This basically turns your mouse into a finger (ew?).
What’s CoffeeScript? Why CoffeeScript?
For the uninitiated, CoffeeScript compiles into pretty clean JavaScript.
So why not just vanilla JavaScript, then? Cut the middle-man?
CoffeeScript is primarily a time-saver. Saves you from writing a lot of JavaScript syntax, and saves you time in reading it with its legible nature and stripped-down syntax. You can look up more debates over the subject than you would ever care to read, but perhaps a good, practical reason to pay attention to it is: with its increasing popularity you might come across somebody’s CoffeeScript one day; wouldn’t you like to understand it?
![]()
View the Demo on CodePen (Touch Only) →
Getting Started
We’re gonna get through this one real quick. To make sense of everything, let’s start with HTML:
<style>
			#touch-area    {
					width: 500px;
					height: 500px;
					background: orange;
			}
	</style>

	<canvas id="touch-area"></canvas>
This is the area to be manipulated. And obviously, this goes in a .html file somewhere. To start tracking touch events on this element, let’s write some CoffeeScript in a separate .coffee file (have CodeKit export this to a .js file, and include that with a <script> anywhere below the HTML element). Something like:
touchCanvas = document.getElementById 'touch-area'
	touchTracker = new TouchTracker(touchCanvas, {swipeThreshold: 400})
As you might have guessed, this does nothing yet, because we haven’t created the class. But our goal, which will hopefully clarify things, is to aim for something with a target element for our first parameter (the element to be tracked), and an optional options object for our second parameter. Having put our cart before the horse (or in other words, how I code things), we can now create said class:
class TouchTracker
		constructor: (@element, params={}) ->


	touchCanvas = document.getElementById 'touch-area'
	touchTracker = new TouchTracker(touchCanvas, {swipeThreshold: 400})
Note: CoffeeScript is NOT white-space ignorant, so indentations and spacing matter for the most bit. Extra lines are OK, but watch your tabs.
We named our class TouchTracker. Because, you know, we’re tracking… whatever. In CoffeeScript, the constructor is code that fires off immediately whenever you invoke this class. We can see our two parameters in the constructor class, and the little ={} is a beautiful CoffeeScript way of making a parameter optional. Now to set up the rest of the defaults:
class TouchTracker
		constructor: (@element, params={}) ->
			# Defaults

			# Distance, in pixels, a touch event can travel while still being considered a “tap”
			@tapThreshold = params.tapThreshold ? 20

			# Maximum time, in milliseconds, for a Tap event (any longer is considered a “Hold”, or something else)
			@tapTimeoud = params.tapTimeoud ? 500

				# Should a Tap be triggered if a touch event drops off an edge of the screen?
			@tapSlideOff = params.tapSlideOff ? false

			# Distance, in pixels, of a “drag” needed to trigger Swipe
			@swipeThreshold = params.swipeThreshold ? 300

			# Should a Swipe be triggered if a drag drops off an edge of the screen?
			@swipeSlideOff = params.swipeSlideOff ? false

			startX: => 0
			startY: => 0
			endX: => 0
			endY: => 0

			@element.addEventListener "touchstart", (e) => @touchStartHandler(e)
			@element.addEventListener "touchend", (e) => @touchEndHandler(e)
You can see the conditional statements such as @tapThreshold = params.tapThreshold ? 20. From now on, we can call those variables, and those will get filled with our default values if the user doesn’t provide any. The startX and startY variables, by contrast, are something that don’t need to be manipulated, but our object will need them later.
Making Touch Events
If you try and run this, nothing good will come of it because we still haven’t built our touchStartHandler and touchEndHandler functions. Let’s do that now:
class TouchTracker
		constructor: (@element, params={}) ->
			# Defaults

			# Distance, in pixels, a touch event can travel while still being considered a “tap”
			@tapThreshold = params.tapThreshold ? 20

			# Maximum time, in milliseconds, for a Tap event (any longer is considered a “Hold”, or something else)
			@tapTimeoud = params.tapTimeoud ? 500

				# Should a Tap be triggered if a touch event drops off an edge of the screen?
			@tapSlideOff = params.tapSlideOff ? false

			# Distance, in pixels, of a “drag” needed to trigger Swipe
			@swipeThreshold = params.swipeThreshold ? 300

			# Should a Swipe be triggered if a drag drops off an edge of the screen?
			@swipeSlideOff = params.swipeSlideOff ? false

			startX: => 0
			startY: => 0
			endX: => 0
			endY: => 0

			@element.addEventListener "touchstart", (e) => @touchStartHandler(e)
			@element.addEventListener "touchend", (e) => @touchEndHandler(e)

		touchStartHandler: (e) =>
			@startX = e.touches[0].pageX
			@startY = e.touches[0].pageY

		touchEndHandler: (e) =>
			@endX = e.changedTouches[0].pageX
			@endY = e.changedTouches[0].pageY
			distance = Math.sqrt(Math.pow(@startX - @endX, 2) + Math.pow(@startY - @endY, 2));
			console.log "Distance: ", distance
			swipeEvent = if distance > @swipeThreshold then "Yes" else "No"
			console.log "Swipe Event? ", swipeEvent
Here we have handlers that will take care of the touch event. If you fire up Google Chrome’s console with touch events enabled, you’ll find that as you click and drag with a mouse (or actually touch, if you test it out on an iPad or similar device) over this area, it’s calculating your overall linear distance between the touchStart and touchEnd. As you can see, it merely draws a straight line between your point A and point B drag. It’s very crude, and doesn’t track your overall distance for a drag; it merely calculates the distance, in pixels, of where your finger / mouse started a drag and where it ended it (Hey! Your math teacher was right—you DID use the Pythagoream theorem for something!). Neat, huh?
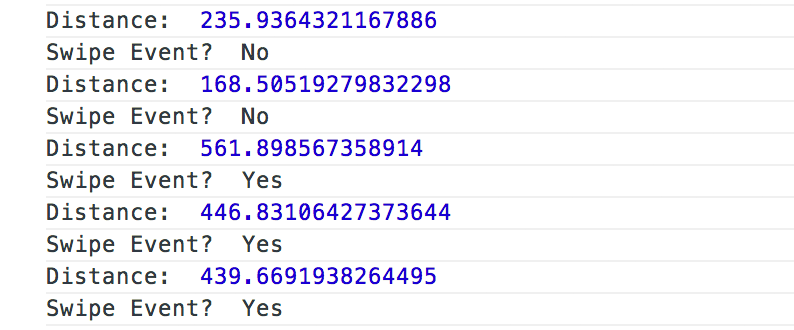
Because we have our swipeThreshold set to 300px, it will only count a linear drag of 300px or more as an official “swipe.” The test is then saved to the swipeEvent variable. Here you can see my attempts at dragging.
The Next Step
So, wait—we’re just getting started. All I have here is a program that only tells me if my finger moved 300px.
Exactly! We didn’t get into the tap events, but you can imagine that this works the same way. You can even do hold and drag events if you figure out some math for that (hint: Google). While this was a very crude way of constructing a real touch library for your applications, the purpose of this was mainly to familiarize yourself with CoffeeScript and JavaScript touch events. You’ll no doubt want to re-structure much of this class to handle a variety of scenarios, but hopefully this got you somewhere.
What about all those unused variables, like tapSlideOff?
Those are for you to figure out! Just some ideas on things to consider when tracking touch events. If you have an Android phone, iPhone, or any tablet device, and if you have ever viewed some touch-based website that did something you didn’t like (a rarity, I know—there are so many “wonderful” mobile sites out there): this is your chance to turn from a complainer into an innovator. Every time you were upset, it was because, subconsciously, some primordial recess of your brain thought of a better way for touch events to behave. Now is your chance to shine! You’re welcome.
You can view the completed demo on CodePen (touch only) →
Philosophical Wrap-up
The interesting thing about touch events is that, to a computer, it has no idea what a “tap” or “swipe” is. Sure, it knows you’re doing some sort of finger-fiddling, and JavaScript will give you a surprisingly verbose set of tools to handle that. We, as humans, define our own gestures. We can define a tap as a quick touch, and a swipe as a linear dragging of a finger, but really, there are potentially infinite gestures in between and around these states.
Why stick to “tap” and “swipe”?
A couple gestures—mainly these—have proven themselves to be intuitive, and gestures we commonly used before touch devices. The goal is for machines to mimic human behavior, thus lowering the barrier to speedy, intuitive use. We tap on a keyboard to produce a key. We swipe a piece of paper to move it across a flat surface (maybe we could translate page turning into a touch gesture with the right hardware one day!). These gestures are more or less intuitive to how we interact with the world, and with new hardware advancements like eye tracking and hover gestures, we’re slowly teaching our machines to think more like we do.